

Since I already had all the material out and since it was Christmas time when I made all my other steampunk crafts. I decided to make an ornament with all the supplies I already had out.
The first Christmas cameo I made did not turn out the way I wanted because the colors mixed. I had the mess up cameo, gift bags from Silver Dollar City, lace, and gears from my Let’s Resin kit. You could put a variety of things on an ornament to make it have the steampunk look.
I used resin to put it all together. This will make it sturdy when dry but while it was wet it slipped around a lot. Hot glue would work just as well I think.
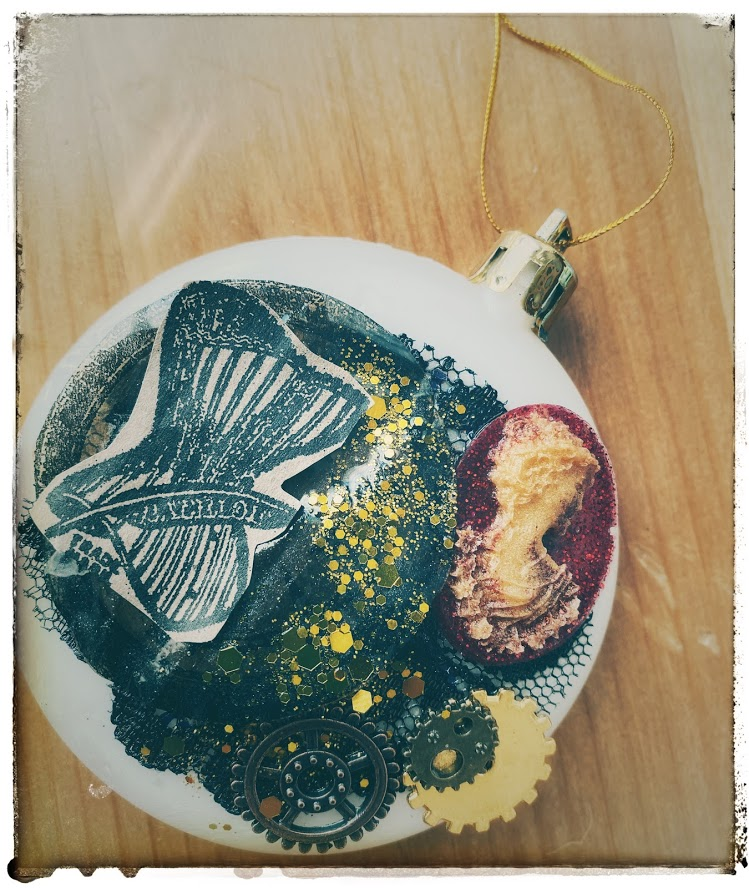
I cut out the clock from the Silver Dollar City gift bag. The cool thing about the bags is the pictures are different sizes based on the size of the bag. I painted resin on the clock and sprinkled the sparkles on the side. When the clock dried it was transparent. You could not see the clock very well which was kind of a bummer.
I put the lace on first then added the clock, the cameo, and the gears. The ornament I used was white ornament but a metal or stained wood would probably work better. The paper corset was added later because you could not really see the clock.

Materials Needed
Blank ornament
Lace
Cameo
Clock image
Gears
Step One
Adhere lace
Step two
Add clock
Step three
Add cameo and gears
1 comment on “DIY Steampunk Ornament”Add yours →
Comments are closed. You can not add new comments.